Adjustments and Controls
Operationally, the simplest scope I have is a rather old (made in the 1980s) Israeli Nimrod 6×40. It has a grand total of two adjustments: elevation and windage knobs. All these knobs do is move the internals of the scope slightly in order to change the position of the reticle.
For the most basic of scopes you use the windage and elevation knobs to dial in the Point of Aim (POA) of the scope to coincide with the Point of Impact (POI) of the rifle. Additionally, if the elevation knob is set up for it, you can use it for trajectory compensation when shooting at extended ranges. That is the case with this old Nimrod scope.
Most modern scopes, even the very inexpensive ones, have more controls than that. First of all, since vast majority of scopes currently made have variable magnification, they also have a magnification or zoom ring, rather predictably located at the forward end of the eyepiece. In the picture below, it is a wide rubber-covered patch that has a the magnification numbers right next to it (the scope is Minox ZA-3 3-9×40 and is set to 9x magnification).

As far as other controls go, this scope also has an eyepiece focus, which is located right at the tail end of the eyepiece (in the picture, it is on the right-most end of the scope next to the “+|-” markings on the scope). The eyepiece focus exist for one reason and one reason only: to make the reticle look as sharp as possible to your eye. It should never be used to focus the image, only the reticle. In effect, it allows you to adjust the scope to the peculiarities of your eyesight. Ideally, you should set the eyepiece focus once, when you first set the scope up and not touch it unless your eyesight changes.
The scope configuration in the picture above is probably the most common one for modern big game hunting scopes. You can adjust windage and elevation (i.e. change the POA via the position of the reticle inside the scope), magnification, and eyepiece focus.
Higher magnification models often add some sort of an image focus adjustment. Image focus adjustment works via one of three means: adjustable objective (AO), side focus (SF), or rear focus. All three acomplish the same task: get the image as sharp as possible and reduce parallax. All three work equally well when properly executed. Unlike the eyepiece focus, this is the adjustment that gets used every time a target at a new distance is engaged. The first two are the more common methods. Rear focus is only used on a couple of scope lines I am aware of and only for fixed magnification scopes. For those designs, image focus adjustment is in the same spot where magnification ring would have been otherwise on variable scopes.
Adjustable Objective looks exactly the way it sounds: there is a knurled ring around the objective bell of the scope that you rotate to bring the image into focus. A good example of AO is on this Sightron S2 Big Sky 6-24×42 (mounted on the rifle):

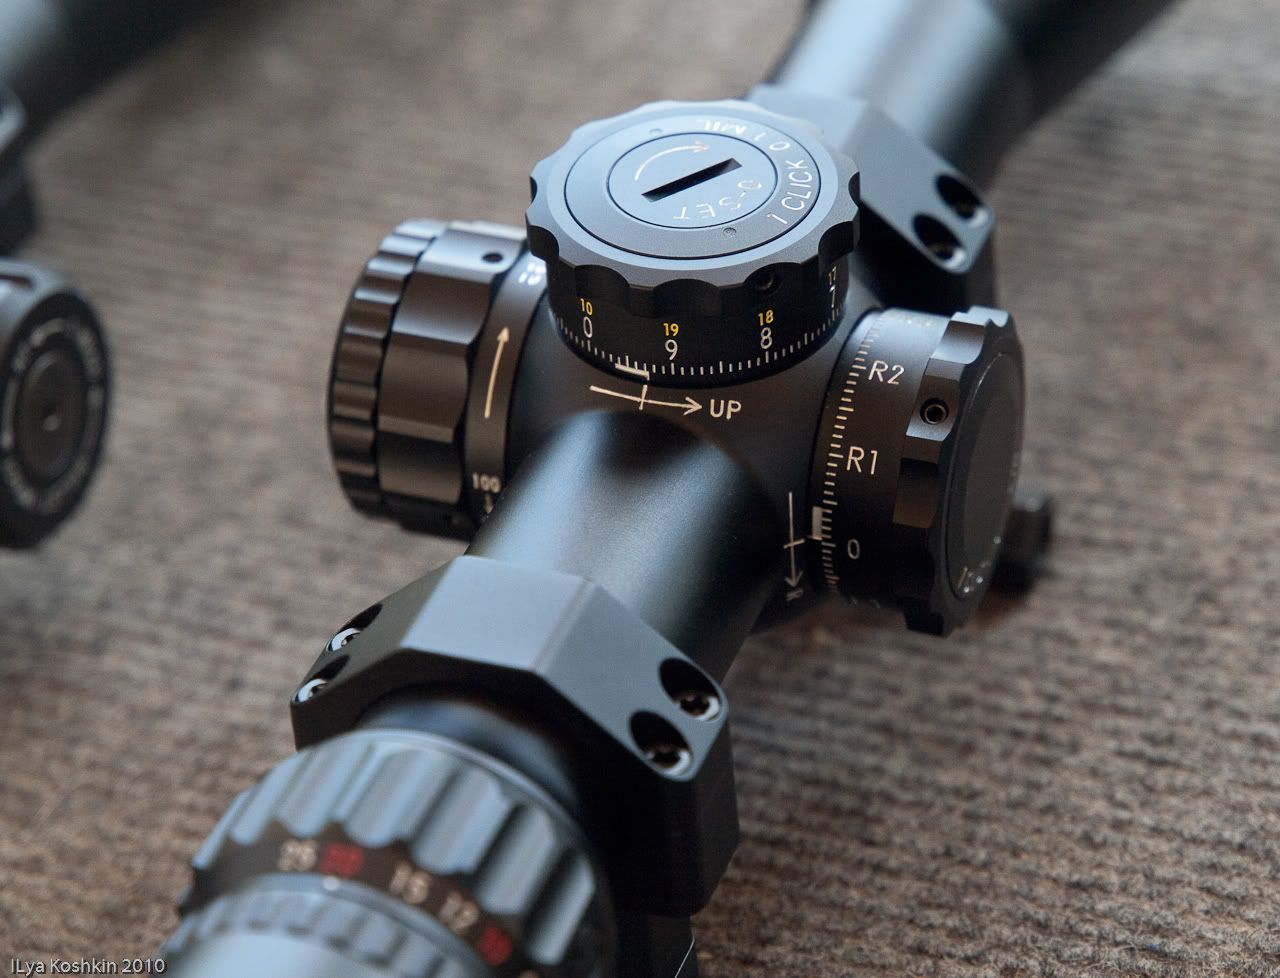
Side Focus is also quite descriptive: it is a knob on the side of the scope, usually on the left of the turret box opposite the windage adjustment, although there are some variations on its exact placement. This is the most “fashionable” of the image focus adjustment methods these days. Here is a look at the center portion of a March Tactical 2.5-25×42 scope. The Side Focus knob is on the left side of the scope:

In principle, AO is somewhat more fragile than Side or Rear Focus; however, in practice, I found that there is little difference between them except for the obvious: location of the control. Depending on the shooter and shooting position, one may be more comfortable than the other. For example, for left-handed shooters, AO and rear focus tend to be more convenient than Side Focus. For a lot of right handed shooters, Side Focus is the most conveniently located option.
Lastly, there is the reticle illumination control. This comes in a bewildering array of shapes and sizes. Most frequently it is an additional knob you can turn, that is placed either on the eyepiece or on the turret box (for scopes without side-focus). In some designs, reticle illumination control is integrated into the side-focus knob or, more recently, simply consists of a couple of pushbuttons on the turret box. For fast majority of the scopes equipped with the reticle illumination, there is a way to adjust its brightness. One hand, that is a good thing, since different lighting conditions require different illumination levels. On the other hand, it is a bad thing since most manufacturers (especially the inexpensive ones) get the illumination levels totally wrong and generally screw up on reticle illumination execution with alarming regularity. For night time, the reticle illumination illumination should be very faint, otherwise it effects your night vision. For day time use in bright sun (to speed up target acquisition for example), in order for the illumination to be visible, it has to be very bright. Vast majority of illuminated reticles out there satisfy neither requirement, so make sure you look into that when choosing a scope. Here is another general rule of thumb: if you want properly executed reticle illumination, prepare to spend a fair amount of money on your scope. There is one company that effectively made its name largely because it developed an unusual and highly effective method of illuminating the reticle: Trijicon. These scopes use a combination of fiber optics and tritium illumination for a, largely, self adjusting brightness level. If your application really requires reticle illumination at a sub-$1000 price, Trijicon should be on your short list of companies to look at.